

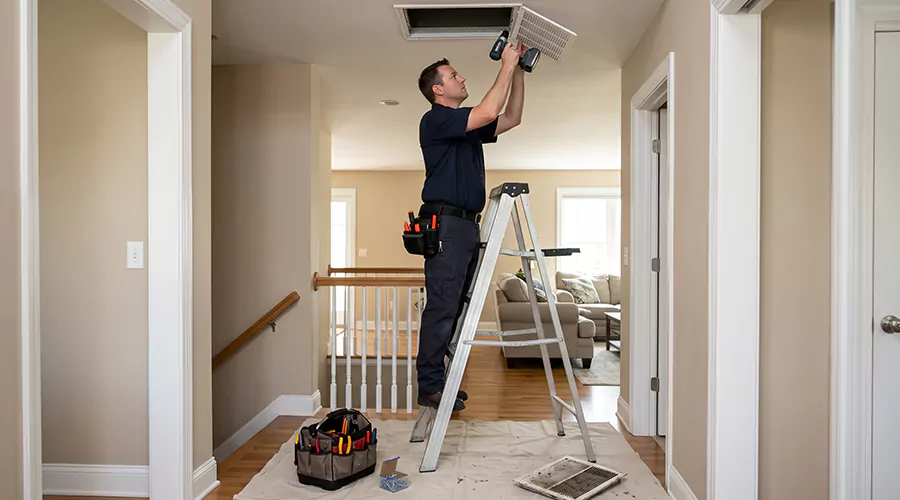
Adding a vent to existing ductwork involves confirming that the HVAC system has enough airflow capacity, selecting an appropriate branch location, installing a new duct connection, and fitting a supply register or return grille. The new opening must be correctly sized, supported, and sealed. Proper air duct installation also includes checking airflow after installation so the additional vent does not create comfort problems in other rooms.
Homeowners often consider adding an HVAC vent when a bedroom receives inadequate cooling, a renovated room lacks a supply register, or an extension needs conditioned air. A new outlet may appear to be a simple solution, but the existing duct network was originally designed to distribute a particular amount of air. Connecting another branch changes how that airflow moves through the system.
Adding a supply vent without evaluating the equipment and existing ducts can reduce the air delivered to nearby rooms. A branch installed on an undersized trunk may create additional resistance rather than improve comfort. Similarly, an enclosed room may need a better return air pathway instead of another supply outlet.
A successful installation begins with finding the cause of the airflow complaint. The contractor should determine whether the new vent is genuinely needed and whether the system can accommodate it. Proper design and testing are more important than simply cutting another opening in an existing duct.
Can You Add a Vent to Existing Ductwork?
Yes. A new supply or return vent can be added to an existing forced-air HVAC system when the equipment and duct network can support the proposed change. The installation may involve connecting a new branch to an existing trunk or extending an appropriately designed return pathway. The correct approach depends on the room's airflow requirements.
Adding a vent does not increase the total heating or cooling capacity of the equipment. It redistributes air already moving through the system unless additional equipment or airflow adjustments are made. This is why an extra supply register can sometimes reduce airflow at other outlets.
A professional assessment should confirm that the existing blower, main ducts, and return pathways are suitable for the proposed modification. If the system already has high static pressure or insufficient airflow, adding another branch may make the problem worse.
When Should You Add Another HVAC Vent?
A new vent may be appropriate when a room lacks a designed supply outlet or when a renovation changes the building's heating and cooling needs. It can also be part of correcting an inadequate air distribution layout. However, uncomfortable temperatures alone are not enough to establish that an additional opening is needed.
Common situations include:
- A room addition that will be connected to an existing central HVAC system.
- A finished attic or basement requiring a designed supply branch.
- An existing room with insufficient supply airflow after other restrictions are ruled out.
- A modified floor plan that changes the intended air distribution.
- A room requiring a dedicated return pathway.
- A redesigned heating or cooling system with additional airflow capacity.
- A previously unserved space that meets the requirements for conditioned occupancy.
Before adding a new supply, check whether the original duct has a closed damper, collapsed section, or loose connection. Correcting these problems may restore airflow without installing another vent. The contractor should also evaluate building insulation and window heat gain because a new duct cannot correct every source of temperature imbalance.
What Is the Difference Between Adding a Supply Vent and a Return Vent?
Supply and return vents perform different functions. A supply vent delivers heated or cooled air from the HVAC system into the room. A return vent provides a pathway for indoor air to move back toward the furnace or air handler.
| Vent Type | Main Function | Installation Concern |
|---|---|---|
| Supply register | Delivers conditioned air | Required airflow and branch capacity |
| Return grille | Directs room air toward equipment | Sufficient return capacity and suitable location |
| Ceiling diffuser | Distributes supply air across a room | Airflow pattern and correct diffuser selection |
| Floor supply register | Delivers air through a floor opening | Duct routing and floor boot connection |
| Transfer grille | Allows air to move between spaces | Room pressure and acoustic considerations |
| Jump duct | Connects rooms for return-air transfer | Sizing and properly sealed duct path |
A supply branch should not be connected to an existing return trunk, and a return grille should not be attached to a supply duct. The direction and purpose of airflow determine the required design.
Some rooms benefit more from return-air improvements than additional supply air. For example, a bedroom with a supply register but no adequate return path may develop a pressure difference when its door is closed. A dedicated return, transfer grille, or properly designed jump duct may be more appropriate.
How Do You Know if Your HVAC System Can Handle Another Vent?
The HVAC system must deliver enough air through its existing duct network before an additional branch is considered. A contractor should evaluate equipment airflow requirements, blower performance, available static pressure, and the condition of the supply and return ducts.
ACCA Manual D provides recognized residential duct design methods. It considers airflow requirements and pressure losses through ducts and fittings. These calculations help establish whether the proposed branch can operate without creating excessive restrictions or depriving existing rooms of air.
The contractor may need to measure airflow at selected registers and inspect the main trunk. A system with significant duct leakage or an overloaded filter should have those issues corrected first. Adding another outlet to an already underperforming system is unlikely to be a reliable solution.
Where Should You Add a New AC Vent?
The best location depends on the room's heating and cooling load and the desired air distribution pattern. A supply register should deliver conditioned air effectively without creating uncomfortable drafts or excessive noise. The position must also allow a suitable duct route from the main system.
Ceiling Vents
Ceiling registers are common when supply ducts run through an attic. A contractor may install a ceiling boot and connect it to a suitable branch. The outlet should be positioned according to the room's airflow requirements rather than simply where attic access is easiest.
The ceiling opening must avoid electrical wiring, framing, and other building systems. Any penetrations of the building's thermal boundary should be sealed appropriately around the boot.
Floor Vents
Floor registers may be practical when the home has an accessible basement or crawlspace. A branch can connect to a suitably positioned floor boot. The contractor must evaluate floor framing and verify that the opening will not damage structural members.
A floor register should remain clear of furniture. Positioning a new outlet beneath a large cabinet or permanent fixture can restrict the air it delivers.
Wall Vents
Wall registers may be suitable when an approved duct route can be installed through a chase or other appropriate space. However, ordinary wall cavities often provide insufficient room for full-size insulated ductwork. The contractor should avoid reducing duct dimensions solely to fit the available cavity.
Wall installations may also require more interior restoration than attic or basement installations. The finished appearance and airflow pattern should be agreed upon before the opening is created.
What Tools and Materials Are Used to Add a Vent?
A professional installer chooses tools according to the duct material and building construction. The installation may involve cutting into sheet metal and creating a new room opening. It also requires suitable fittings that maintain an airtight connection.
| Material or Tool | Purpose |
|---|---|
| Appropriately sized branch duct | Carries air to or from the new opening |
| Approved branch takeoff collar | Connects the new duct to a main trunk |
| Register boot or return box | Connects ductwork to the room opening |
| Supply register or return grille | Provides the finished room opening |
| Mechanical fasteners | Secure fittings and duct connections |
| HVAC mastic or approved closure products | Seal duct joints |
| Proper duct supports | Prevent sagging and movement |
| Suitable insulation | Protects ducts outside conditioned space |
| Sheet metal snips or approved cutting equipment | Prepares metal duct openings |
| Airflow measurement equipment | Checks the effect of the new branch |
The materials must match the existing system and applicable installation requirements. A flexible branch needs proper inner-liner attachment and support. Rigid metal ducts require mechanically fastened joints and appropriate sealing.
The main objective is to create a designed air pathway, not merely an opening in a metal trunk.
How to Add a Vent to Existing Ductwork Step by Step?
Adding a vent is a modification to the HVAC distribution system. The procedure below describes how a qualified installer approaches a typical new supply branch connected to an existing trunk. The final design and installation should follow the specific equipment, duct materials, and local mechanical requirements.
Step 1. Identify the Reason for the New Vent
Begin by determining why the room needs additional airflow. Check whether the existing system has disconnected ducts, blocked registers, or a heavily loaded filter. A room may appear underserved when a damaged branch is actually responsible.
The contractor should also consider the room's insulation, windows, and heating or cooling load. A new supply outlet should be based on the air the room needs, not simply a desire for another visible register.
Step 2. Inspect the Existing Duct Network
Locate the main supply trunk and the branches serving nearby rooms. Inspect accessible sections for leakage, damage, and restrictions. Determine whether the trunk has a suitable location for another takeoff without weakening the duct or interfering with an existing fitting.
A main duct that is already undersized may not support the proposed branch adequately. The condition of the return system should also be evaluated. A new supply without an adequate return pathway can create unwanted pressure differences.
Step 3. Measure Existing System Performance
A qualified contractor may measure system static pressure and airflow at relevant registers. These measurements help establish whether the blower is operating under suitable conditions. They can also reveal that the existing system needs repair or balancing before a new branch is added.
Measurements are particularly useful when the homeowner reports that several rooms receive weak airflow. Adding a vent without understanding the existing airflow distribution may simply move the problem from one room to another.
Step 4. Calculate the New Room's Airflow Requirement
Determine the heating and cooling load of the room to be served. The proposed supply airflow should reflect that load and the temperature characteristics of the HVAC system. ACCA Manual J and Manual D principles can help establish the appropriate room airflow and duct sizing.
A small bedroom and a large sunroom may require different amounts of conditioned air. Selecting the same branch size for every room can produce poor distribution. The calculated airflow should guide the new duct and register selection.
Step 5. Design the New Branch
Choose the duct size and route based on the required airflow and available static pressure. The design must account for duct length, fittings, and bends. It should also consider the effect of the new branch on existing trunk airflow.
A short, relatively direct route is generally preferable to a long path containing several sharp changes in direction. Flexible duct can be suitable for certain branches, but it must not be left compressed or unsupported. A rigid transition may be appropriate where the route requires a tighter change in direction.
Step 6. Choose the Register Location
Select a position that supports effective air distribution in the room. The register must not be blocked by permanent furnishings. Its airflow pattern should be appropriate for the space and nearby occupied areas.
Before cutting, inspect the proposed location for electrical wiring, plumbing, and structural framing. The opening should not interfere with load-bearing members or required fire-rated construction. A different position may be needed when the preferred location conflicts with building systems.
Step 7. Check Permits and Existing Building Materials
Local mechanical permits may be required for adding new duct branches or modifying the distribution system. The contractor should verify applicable rules. Some projects may also involve building modifications requiring additional review.
Older homes can contain lead-based paint or asbestos-containing materials. These hazards should be evaluated before cutting painted or insulated surfaces. Work should not proceed through suspect materials without appropriate precautions.
Step 8. Shut Down the HVAC System
Turn off heating and cooling operation before opening the main duct. Qualified personnel should follow appropriate equipment isolation procedures when working near an air handler, furnace, or electrical components. The blower should not run while the ductwork is open.
This helps prevent construction debris from being pulled into the system or distributed through occupied rooms. The work area should also be protected so dust from cutting remains controlled.
Step 9. Prepare the Branch Takeoff Location
Mark the approved connection location on the existing supply trunk. The opening must correspond to the selected takeoff fitting. It should not interfere with adjacent seams, dampers, or structural supports.
The contractor uses suitable tools for the duct material and controls sharp edges and debris. Cutting into a trunk without a fitting plan can weaken the connection or create leakage. The work should follow the design rather than rely on a rough opening.
Step 10. Install the Takeoff Fitting
Position the approved branch takeoff collar in the prepared opening. Secure the fitting mechanically according to the product and duct requirements. Apply compatible duct sealant where appropriate to make the connection airtight.
A takeoff should fit tightly and remain supported. A loose fitting can leak even if the new branch duct itself is correctly installed. The contractor should inspect the connection before surrounding insulation or other materials cover it.
Step 11. Install the New Register Boot
Create the approved opening at the selected room location and position the register boot. Secure the boot to suitable framing or other approved supports. The boot must remain stable rather than hang from the flexible branch.
The connection where the boot meets the ceiling, floor, or wall may also require sealing. Department of Energy guidance recommends sealing HVAC register boots at penetrations through the building's thermal envelope. This helps limit unwanted air movement through the surrounding construction.
Step 12. Install the Branch Duct
Connect the new duct between the takeoff and register boot. Rigid metal sections should use appropriate fittings and supports. A flexible branch should be fully extended along its intended route without unnecessary loops or compression.
The duct's diameter must remain suitable throughout the run. Avoid forcing it through a narrow space that restricts the air passage. The route should also remain accessible enough for inspection where practical.
Step 13. Secure and Seal Duct Connections
Mechanically attach both ends of the branch using methods approved for the duct material. Flexible duct inner liners should be secured to collars with suitable drawbands or other approved fasteners. Metal connections should be fastened according to the applicable installation requirements.
Seal the connections using compatible HVAC mastic or listed closure products. Ordinary cloth-backed duct tape should not be relied upon as a permanent sealing method. Airtight connections help prevent the new branch from wasting conditioned air.
Step 14. Install Supports and Insulation
Support the new duct so it maintains its intended shape. Flexible ducts should use suitable wide straps or saddles that do not compress the insulation or inner liner. Metal ducts require hangers appropriate for their weight and size.
Ducts located outside conditioned space generally require insulation under applicable energy codes. Insulation should remain continuous around fittings and connections. The exterior vapor barrier should also be restored where required.
Step 15. Install the New Register
Attach the supply register to its boot using suitable fasteners. Confirm that its nominal dimensions match the actual opening. The register should sit securely without large gaps or rattling.
Directional louvers should be positioned to distribute air appropriately. A decorative cover with insufficient free area may create unnecessary resistance. The selected register should match the designed airflow.
Step 16. Restore Normal Operation
After the ductwork is complete and the equipment is ready, restore HVAC operation. Check that conditioned air reaches the new outlet. Listen for excessive rushing noise or vibration that could indicate a restrictive fitting or loose connection.
An operating register alone does not prove that the new branch delivers the correct amount of air. The contractor should evaluate its performance along with the existing outlets.
Step 17. Check Airflow Distribution
Measure airflow at the new register and selected existing outlets when appropriate. If the added branch has reduced airflow elsewhere, the system may need balancing or design corrections. Dampers should be adjusted according to the airflow plan rather than closed randomly.
The contractor may also review static pressure to confirm that the equipment remains within suitable operating conditions. The installation is complete when the modified distribution system performs acceptably as a whole.
Can You Add a Vent by Cutting Into an Existing Duct?
A new branch is commonly connected to an existing sheet metal trunk through an approved takeoff fitting. However, cutting a hole alone is not enough. The new branch needs proper sizing, a mechanically secured connection, and appropriate sealing.
The trunk must also have enough capacity for the additional branch. Adding an opening near the wrong point can interfere with airflow to existing outlets. A qualified contractor should determine the connection location before cutting.
Flexible ductwork generally should not be modified by simply cutting a hole into its side and taping another duct over the opening. A properly designed junction box or approved fitting is required when branches must be divided.
Will Adding Another Vent Reduce Airflow Elsewhere?
It can. A new supply branch provides another pathway for air leaving the HVAC equipment. If the existing blower and trunk cannot supply the required airflow, other branches may receive less.
The effect depends on the design and system conditions. A properly sized new branch connected to a system with available capacity may work well. An addition to a restricted system may create weak airflow or uncomfortable temperatures in other rooms.
A contractor should evaluate the existing duct system before installing the new branch. Airflow measurements afterward help identify whether balancing or further modifications are required.
Can You Add a Vent to a Bedroom?
Yes, when the bedroom requires additional designed supply airflow and the central HVAC system can support it. However, a bedroom may already receive enough supply air while lacking a suitable return path. This can create pressure differences when the door is closed.
The Department of Energy recommends evaluating return-air pathways in enclosed rooms. Dedicated returns, transfer grilles, or properly designed jump ducts can help maintain suitable pressure balance. A new supply vent should not be used as a substitute for correcting an inadequate return arrangement.
The contractor should investigate why the bedroom is uncomfortable before deciding which modification to make.
Can You Add a Vent to a Basement?
Adding a vent to a finished basement may be possible when the space is intended to be heated or cooled by the existing system. The contractor must calculate the basement's load and identify a suitable supply branch location. An appropriate return pathway is also needed.
Basements often have accessible main trunks, but this does not automatically mean additional air can be taken from them. The HVAC system may already be operating near its intended capacity. Poor insulation or moisture conditions may also affect basement comfort.
The installation should address airflow and the room's actual use. A vent connected to a system without sufficient capacity may provide little improvement.
How Much Does Adding a Vent to Existing Ductwork Cost?
HomeGuide estimates approximately $250 to $500 for adding a vent to existing ductwork in many residential projects. Angi's March 2026 guide reports approximately $200 to $500 for professional installation. More involved projects can cost more when long branches or finished-surface modifications are needed.
The price depends on the distance to a suitable trunk and how easily the new duct can be installed. The cost of a register is relatively small compared with labor and building access. A new return pathway may also have different requirements from a supply vent.
A written quote should state whether duct sizing, branch installation, register placement, sealing, and final airflow checks are included.
What Mistakes Should You Avoid When Adding an HVAC Vent?
Adding a new outlet can produce unexpected airflow problems when it is treated as a simple hole-cutting project. The complete heating and cooling system must be considered before the branch is installed.
Avoid these mistakes:
- Adding a vent before diagnosing existing airflow problems.
- Assuming the blower has unlimited additional capacity.
- Choosing duct size by guesswork.
- Cutting into an undersized or damaged trunk.
- Connecting a supply branch to a return duct.
- Installing a branch with unnecessary length or sharp bends.
- Failing to secure the takeoff mechanically.
- Leaving connections unsealed.
- Omitting insulation in unconditioned spaces.
- Blocking the new outlet with furniture.
- Ignoring return-air pressure in enclosed rooms.
- Cutting structural framing without approval.
- Disturbing older hazardous materials.
- Skipping airflow and system pressure checks.
The installation should improve the intended room without creating new problems elsewhere. Measurements provide a better basis for judging the result than simply feeling air at the new opening.
Should You Add a Vent Yourself or Hire a Professional?
A homeowner may be comfortable replacing an existing grille, but adding a new branch changes the HVAC duct network. The installer must evaluate airflow, choose appropriate fittings, and make airtight connections. Cutting into finished surfaces can also introduce electrical and structural hazards.
A qualified HVAC contractor is generally recommended for new supply or return branches. The contractor should explain how the existing system will accommodate the change. Professional airflow testing is particularly useful when the added vent is intended to correct a persistent comfort problem.
Conclusion
Adding a vent to existing ductwork is possible when the heating and cooling system has adequate capacity and the new branch is properly designed. The installation requires a suitable takeoff, correctly sized duct, secure register boot, and airtight connections. A new supply outlet should not be added before existing restrictions and return-air problems have been evaluated. Testing helps confirm that other rooms continue receiving suitable airflow. Before cutting into an existing trunk, have the system inspected and the proposed branch sized appropriately.